
Docker vs Virtual Machines
While Docker and virtual machines serve a similar purpose, their performance, OS support, and portability differ significantly.
The main difference is that Docker containers share the host’s operating system, while virtual machines also have a guest operating system running on top of the host system. This method of operation affects the performance, hardware needs, and OS support. Check the table below for an in-depth comparison.
| Criteria | Docker | Virtual Machine |
|---|---|---|
| OS | Shared OS between containers. | New OS for each VM. |
| Security | Less secure because the operating system and kernel are shared. | More secure as VMs don’t share the operating system. |
| Performance | Fast performance even with several containers. | More virtual machines equal less stable performance. |
| Boot-up time | Fast (seconds). | Slow (minutes). |
| Memory needs | Lightweight. | Require a lot of memory. |
| Storage needs | Usually megabytes. | Usually gigabytes. |
| Portability | Easy to deploy in different environments. | Hard to port a VM to another system. |
Even though Docker’s container technology comes on top in most aspects, virtual machines are more secure because the OS is kept independent from the hardware.
Docker vs Docker Engine
Docker is the name of the platform, while Docker Engine is an open-source container technology that consists of a Docker server (daemon), client, and APIs. People might also confuse the software with the Docker client because it’s also called docker, only in lowercase letters.
Removing All Unused Docker Resources
Docker doesn’t remove any unused data by itself, which can result in cluttering your disk space.
If you’d like to remove all images, containers, and networks that are not associated with a container,
docker system prune
This command will remove everything, including dangling images and stopped containers, as the following message will tell you:
WARNING! This will remove:
– all stopped containers
– all networks not used by at least one container
– all dangling images
– all dangling build cache
Are you sure you want to continue? [y/N]
In order to include all unused images, execute the following command:
docker system prune -a
Here’s the warning message that you’ll see before continuing:
WARNING! This will remove:
– all stopped containers
– all networks not used by at least one container
– all images without at least one container associated to them
– all build cache
Are you sure you want to continue? [y/N]
However, the previous two commands will not touch unused volumes – this is done deliberately for safety reasons.
If you’d like to remove that as well, use the following command:
docker system prune –volumes
Docker Objects
When you use Docker, you are creating and using images, containers, networks, volumes, plugins, and other objects. This section is a brief overview of some of those objects.
Docker Container
Docker is among the most popular open-source container-based tools. It is used to run instances of Docker images since these create a new Docker container.
In other words, images can be considered as a template that can be used to create containers. They contain information about what’s required to develop and run a container. Another excellent image feature is that multiple images can be stored locally or remotely.
A container is a runnable instance of an image. You can create, start, stop, move, or delete a container using the Docker API or CLI. You can connect a container to one or more networks, attach storage to it, or even create a new image based on its current state.
By default, a container is relatively well isolated from other containers and its host machine. You can control how isolated a container’s network, storage, or other underlying subsystems are from other containers or from the host machine.
A container is defined by its image as well as any configuration options you provide to it when you create or start it. When a container is removed, any changes to its state that aren’t stored in persistent storage disappear.
Create a Docker Container
In this section, we will use the Ubuntu 20.04 virtual private server and assume you already have Docker installed. Therefore, start by accessing your VPS via SSH.
To list all Dockers images on your system, you can use the following command:
sudo docker images
If you want to display additional information, enter the following command in the command line:
sudo docker images –help
Let’s say we don’t have any Docker images on our system, so let’s pull a new one first.
To do that, first, go to the Docker Hub. Here you will find thousands of Docker base images.
In this example, we will pull a MySQL image. Note that you can browse each image’s page to see more details about the image.
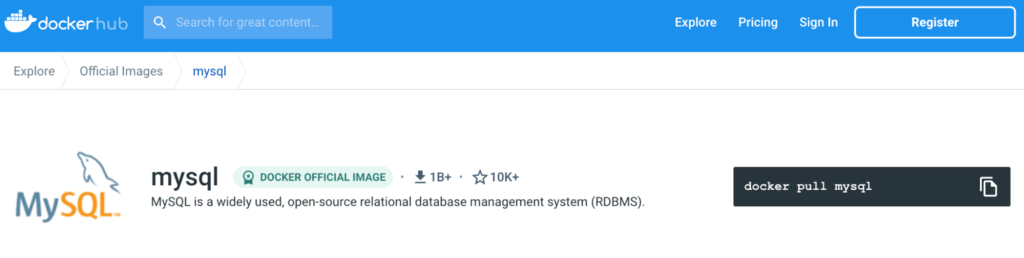
You can pull the new image to the current directory with the command:
docker pull <image name or image id>
Using the -q option will list only numeric IDs of images available on your system:
sudo docker images -q
-f is the filter flag. If you want to list all images that are not dangling (tagged or referenced by a new container), use the following command in the command line:
sudo docker images -f ‘dangling=false’
Now that you know how to pull and locate an image to start a Docker container, it’s time to run it. By running an image, you will create a container out of that image.
To start a Docker container, use the docker run command:
docker run <image_name>
We will run the MySQL image. As such, the command will be:
docker run mysql
Our container is created but not started. To start it, use this command via the command prompt:
docker run –name MyContainer -it mysql bash
Here –name MyContainer is how we wish to call the running process, while -it mysql bash names which container we are running.
Now, open another terminal window. SSH into the server, and run the Docker ps command:
sudo docker ps -a
As you can see, the container named MyContainer is now running. To stop the container, issue the following command:
sudo docker stop MyContainer
If you wish to see the top process of a container, we can run this command:
docker top MyContainer
MyContainer represents your container name.

To see additional stats, such as container ID, CPU utilization, or memory usage, use this command:
docker stats

Lastly, if you need to terminate a Docker container, use the following:
sudo docker kill MyContainer
That’s all there is to it – our Docker container is now ready to use.
Remove Docker Containers
In order to see the list of all Docker containers, you will need to run this command:
docker container ls -a
If you want to remove a specific container, enter the CONTAINER ID as shown in this example:
docker container rm CONTAINER_ID
To remove all the containers that stopped in the application, follow this command:
docker container prune
Take note that this will remove all stopped containers. In order to view the list of what containers will be deleted using the before mentioned command, use the –filter flag:
docker container ls -a –filter status=created –filter status=exited
To limit the removal of containers that stopped, for example, according to the time frame, you can use the following command:
docker container prune –filter “until=24h”
If you want to remove a container once you’re done working with it, you start one by adding a –rm flag. Here’s an example of how to remove such container:
docker run –rm CONTAINER_ID
When you’re done, the container will be deleted automatically.
Docker Hub
To make image sharing easier, Docker came up with a streamlined image-sharing platform – Docker Hub. Here users can easily share, upload and manage their images.
No matter the operating system you use, whether it’s Ubuntu on a virtual instance or Windows, users will still be able to find popular images like MySQL or WordPress on Docker Hub.
Users can always pick the paid version of Docker Hub if the free version proves to be lacking. It offers more robust features, vulnerability scans, and concurrent builds.
Docker Hub is a registry service on the cloud that allows you to download Docker images that are built by other communities. You can also upload your own Docker built images to Docker hub.
Docker Hub Login
The official site for Docker hub is − https://www.docker.com/community-edition#/add_ons
First you need to do a simple sign-up on Docker hub.
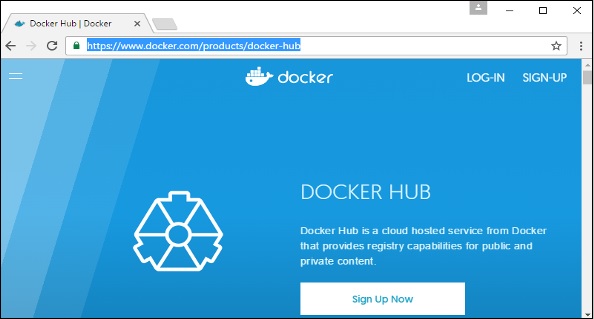
Once you have signed up, you will be logged into Docker Hub.

Browse Jenkins Image
Next, let’s browse and find the Jenkins image.

Run Jenkins
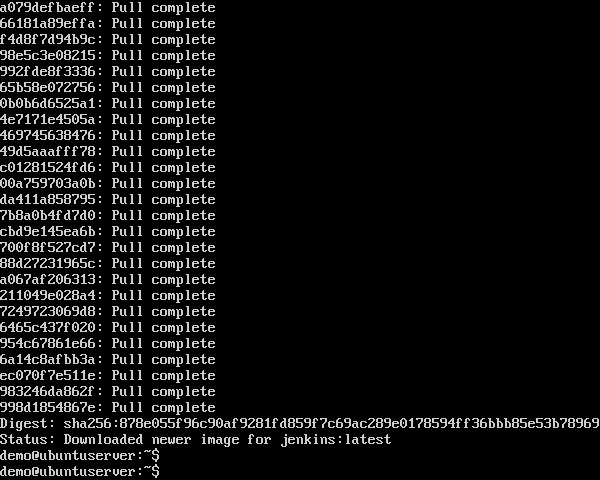
You can see the Docker pull command. This will be used to download the Jenkins image onto the local server.
Now, go to the Ubuntu server and run the following command:
sudo docker pull jenkins/jenkins
To run Jenkins, you need to run the following command:
sudo docker run -p 8080:8080 -p 50000:50000 jenkins
Note the following points about the above sudo command:
- We are using the sudo command to ensure it runs with root access.
- Here, jenkins is the name of the image we want to download from Docker hub and install on our Ubuntu machine.
- -p is used to map the port number of the internal Docker image to our main Ubuntu server so that we can access the container accordingly.
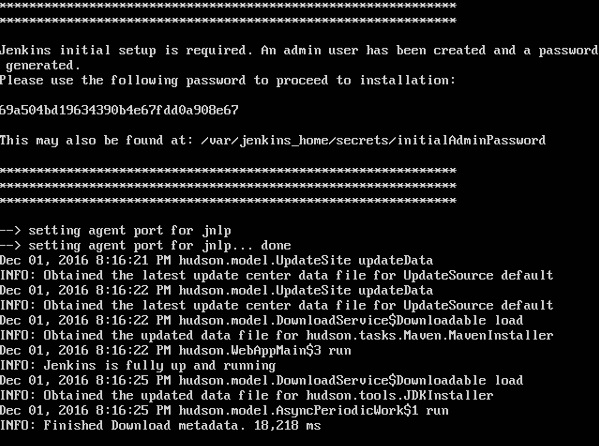
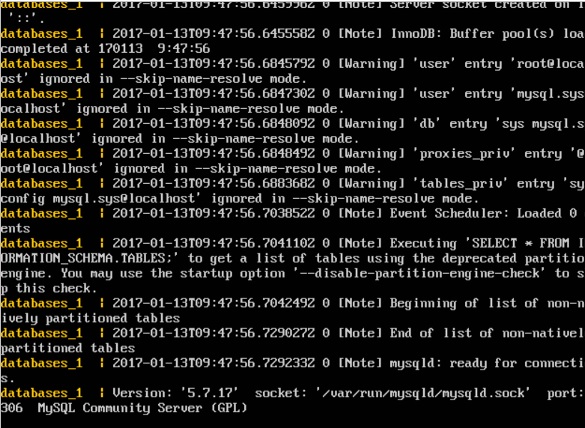
You will then have Jenkins successfully running as a container on the Ubuntu machine.
Dockerfile
Docker images instruct the server on the exact requirements for creating a Docker container. On the other hand, a Docker file is an actual text file containing all the docker commands needed to assemble a container image. If a user wishes to create an image, they would need to create a Dockerfile with all the required commands for the server.
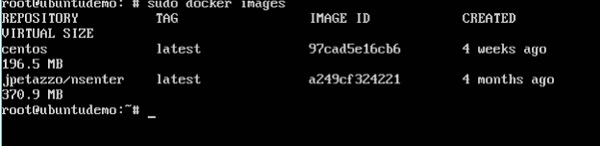
If we use the Docker images command, we can see the existing images in our system. From the below screenshot, we can see that there are two images: centos and nsenter.
But Docker also gives you the capability to create your own Docker images, and it can be done with the help of Docker Files. A Docker File is a simple text file with instructions on how to build your images.
Create a Docker File
The following steps explain how you should go about creating a Docker File.
Create a file called Docker File and edit it using vim. Please note that the name of the file has to be “Dockerfile” with “D” as capital.

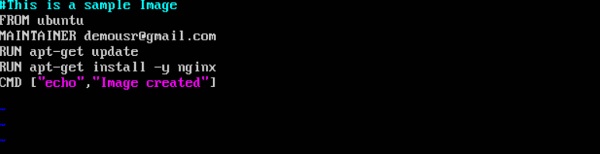
Build your Docker File using the following instructions.
#This is a sample Image
FROM ubuntu
MAINTAINER learn.technology@corporatesstore.com
RUN apt-get update
RUN apt-get install –y nginx
CMD [“echo”,”Image created”]
The following points need to be noted about the above file:
The first line “#This is a sample Image” is a comment. You can add comments to the Docker File with the help of the # command.
The next line has to start with the FROM keyword. It tells docker, from which base image you want to base your image from. In our example, we are creating an image from the ubuntu image.
The next command is the person who is going to maintain this image. Here you specify the MAINTAINER keyword and just mention the email ID.
The RUN command is used to run instructions against the image. In our case, we first update our Ubuntu system and then install the nginx server on our ubuntu image.
The last command is used to display a message to the user.
Save the file.
Docker Images
An image is a read-only template with instructions for creating a Docker container. Often, an image is based on another image, with some additional customization. For example, you may build an image which is based on the ubuntu image, but installs the Apache web server and your application, as well as the configuration details needed to make your application run.
You might create your own images or you might only use those created by others and published in a registry. To build your own image, you create a Dockerfile with a simple syntax for defining the steps needed to create the image and run it. Each instruction in a Dockerfile creates a layer in the image. When you change the Dockerfile and rebuild the image, only those layers which have changed are rebuilt. This is part of what makes images so lightweight, small, and fast, when compared to other virtualization technologies.
In Docker, everything is based on Images. An image is a combination of a file system and parameters. Let’s take an example of the following command in Docker.
docker run hello-world
The Docker command is specific and tells the Docker program on the Operating System that something needs to be done.
The run command is used to mention that we want to create an instance of an image, which is then called a container.
Finally, “hello-world” represents the image from which the container is made.
Now let’s look at how we can use the CentOS image available in Docker Hub to run CentOS on our Ubuntu machine. We can do this by executing the following command on our Ubuntu machine.
sudo docker run -it centos /bin/bash
Note the following points about the above sudo command:
We are using the sudo command to ensure that it runs with root access.
Here, centos is the name of the image we want to download from Docker Hub and install on our Ubuntu machine.
-it is used to mention that we want to run in interactive mode.
/bin/bash is used to run the bash shell once CentOS is up and running.
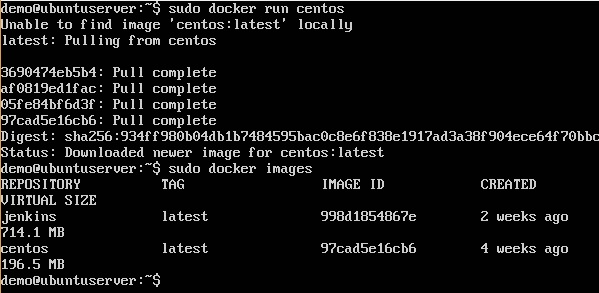
Display Docker Images
sudo docker images
When we run the above command, it will produce the following result:
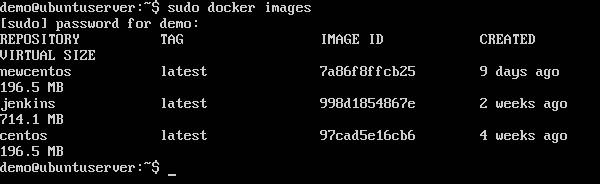
From the above output, you can see that the server has three images: centos, newcentos, and jenkins. Each image has the following attributes:
TAG − This is used to logically tag images.
Image ID − This is used to uniquely identify the image.
Created − The number of days since the image was created.
Virtual Size − The size of the image.
sudo docker images -q
When we run the above command, it will produce the following result:

This command is used to return only the Image ID’s of the images.
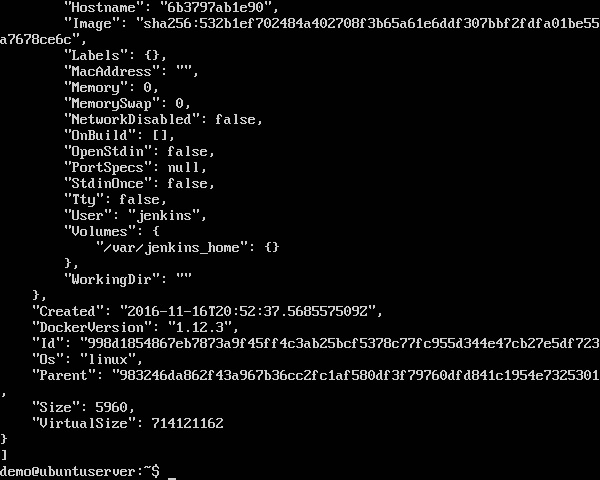
sudo docker inspect jenkins
This command is used see the details of an image or container.
When we run the above command, it will produce the following result:
Download Docker Images
Images can be downloaded from Docker Hub using the Docker run command. Let’s see in detail how we can do this.
sudo docker run centos
This command will download the centos image, if it is not already present, and run the OS as a container.
When we run the above command, we will get the following result:
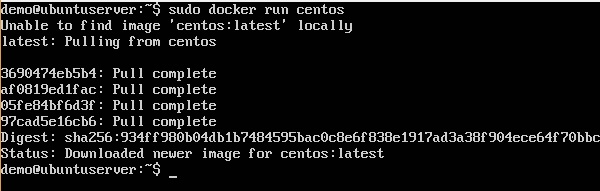
You will now see the CentOS Docker image downloaded. Now, if we run the Docker images command to see the list of images on the system, we should be able to see the centos image as well.
Remove Docker Images
In order to view all of your Docker images, you can use:
docker images -a
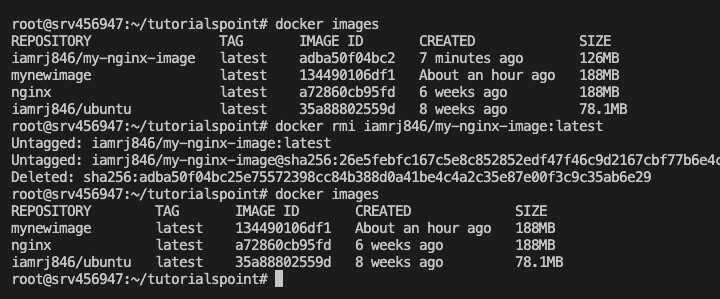
If you want to remove Docker image or a few, you can use this command and list the IMAGE ID as shown here:
docker image rm IMAGE_ID
The Docker images on the system can be removed via the docker rmi command. Let’s look at this command in more detail.
sudo docker rmi 7a86f8ffcb25
Here, 7a86f8ffcb25 is the Image ID of the newcentos image.
When we run the above command, it will produce the following result:
To remove dangling images that are most recent and untagged, we will use the “docker remove all images” command as shown here:
docker image prune
However, to remove Docker images that are present in existent containers that are also tagged, we can use this:
docker image prune –a
If you wish to remove all images, for example, that may fall under a specific time frame, use the command:
docker image prune -a –filter “until=24h”
Docker Volumes
Volumes are the preferred mechanism for persisting data generated by and used by Docker containers.
You can manage volumes using Docker CLI commands or the Docker API.
Volumes work on both Linux and Windows containers.
Volumes can be safely shared among multiple containers.
Volume drivers let you store volumes on remote hosts or cloud providers, encrypt the contents of volumes, or add other functionality.
New volumes can have their content pre-populated by a container.
In addition, volumes are often a better choice than persisting data in a container’s writable layer, because a volume doesn’t increase the size of the containers using it, and the volume’s contents exist outside the lifecycle of a given container.
Volumes are used for multiple containers, and it is very likely there will be a number of either unused or stopped volume files.
Remove Docker Volumes
These files are not removed automatically, neither is there a setting in Docker to do so, as that can cause significant loss or damage to data.
First, to get all Docker volume IDs, use the following command:
docker volume ls
If you want to remove a certain volume, use this command followed by the VOLUME NAME:
docker volume rm VOLUME_NAME
To remove all unused volumes using a single command, you can use the following:
docker volume prune
If Docker volumes have labels attached to them, you can also use this:
docker volume prune –filter “label!=keep”
docker volume prune –filter “label!=keep”
Docker Networks
Docker Networking allows you to create a Network of Docker Containers managed by a master node called the manager.
The Docker network is a virtual network created by Docker to enable communication between Docker containers.
If two containers are running on the same host they can communicate with each other without the need for ports to be exposed to the host machine.
You may use Docker to manage your Docker hosts in any platform manner, regardless of whether they run Windows, Linux, or a combination of the two.
Docker takes care of the networking aspects so that the containers can communicate with other containers and also with the Docker Host.
If you do an ifconfig on the Docker Host, you will see the Docker Ethernet adapter. This adapter is created when Docker is installed on the Docker Host.
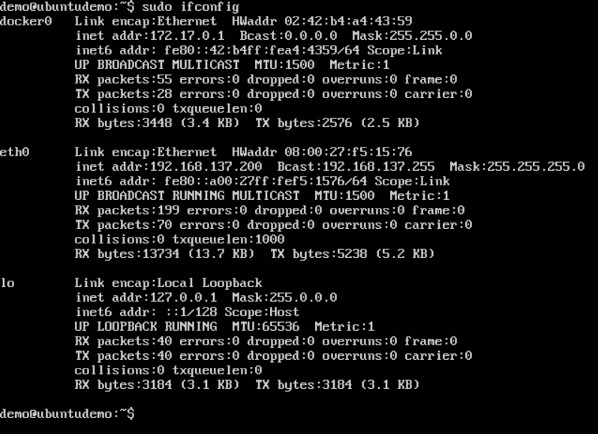
This is a bridge between the Docker Host and the Linux Host.
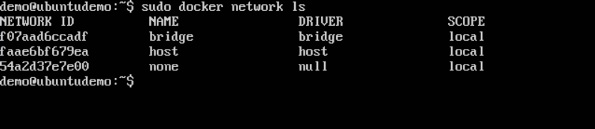
List Docker Networks
sudo docker network ls
This command can be used to list all the networks associated with Docker on the host.
The output of the above command is shown below:
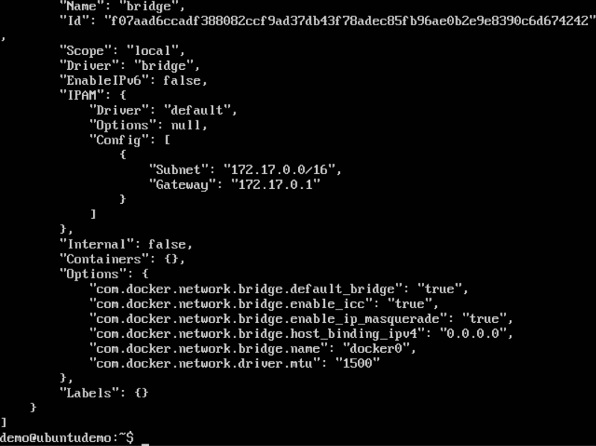
Inspect a Docker Network
sudo docker network inspect bridge
If you want to see more details on the network associated with Docker, you can use the Docker network inspect command.
The output of the above command is shown below:
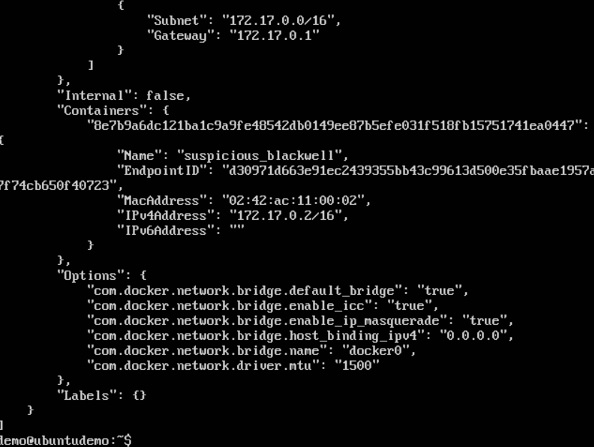
Now let’s run a container and see what happens when we inspect the network again. Let’s spin up an Ubuntu container with the following command:
sudo docker run -it ubuntu:latest /bin/bash

Now if we inspect our network name via the following command, you will now see that the container is attached to the bridge.
sudo docker network inspect bridge
Create New Network
One can create a network in Docker before launching containers. This can be done with the following command:
sudo docker network create –-driver bridge new_nw
The output of the above command is shown below:

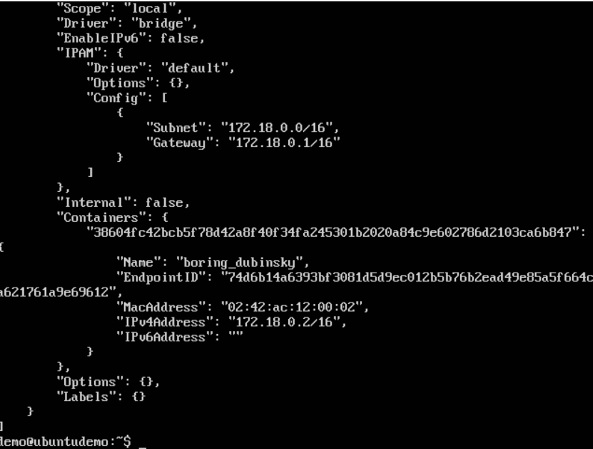
You can now attach the new network when launching the container. So let’s spin up an Ubuntu container with the following command:
sudo docker run –it –network=new_nw ubuntu:latest /bin/bash

And now when you inspect the network via the following command, you will see the container attached to the network.
sudo docker network inspect new_nw
Remove Docker Networks
Though Docker networks don’t take much disk space, it can cause some problems if unnecessary files are not cleared from the disk.
One problem is that it creates rules for iptables and bridge networks with routing table entries, which can cause some issues in the long run.
For a full list of NETWORK IDs, use the following command:
docker network ls
In order to remove a specific network, you can use:
docker network rm NETWORK_ID
If you wish to remove all unused networks, use the following command:
docker network prune
For a filter based on the time frame, 24 hours in this example, you can simply enter instead:
docker network prune –filter “until=24h”
Docker Compose
Docker Compose is a utility that allows us to display images in Docker. It was created because many programs require other services to run.
With Docker Composer we can define everything in a file, with all the images dependent on the main one and load them normally.
Docker Compose is used to run multiple containers as a single service. For example, suppose you had an application which required NGNIX and MySQL, you could create one file which would start both the containers as a service without the need to start each one separately.
Docker Compose Installation
The following steps need to be followed to get Docker Compose up and running.
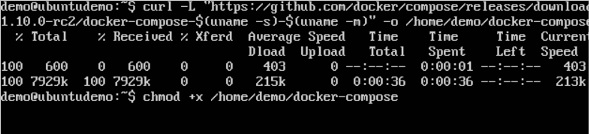
Download the necessary files from github using the following command:
curl -L “https://github.com/docker/compose/releases/download/1.10.0-rc2/dockercompose -$(uname -s) -$(uname -m)” -o /home/demo/docker-compose
The above command will download the latest version of Docker Compose which at the time of writing this article is 1.10.0-rc2. It will then store it in the directory /home/demo/.

Next, we need to provide execute privileges to the downloaded Docker Compose file, using the following command:
chmod +x /home/demo/docker-compose
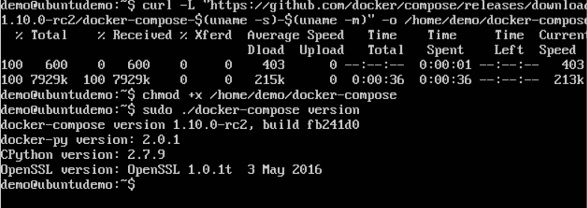
We can then use the following command to see the compose version.
sudo ./docker-compose -version
You will then get the following output:
Create Docker Compose File
Let’s go ahead and create our first Docker Compose file. All Docker Compose files are YAML files. You can create one using the vim editor. So execute the following command to create the compose file:
sudo vim docker-compose.yml
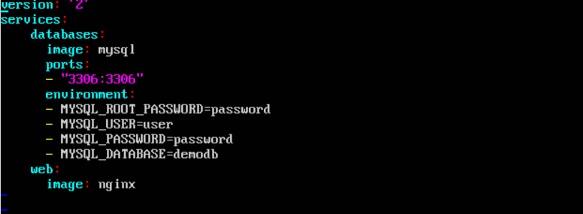
Let’s take a close look at the various details of this file:
- The database and web keyword are used to define two separate services. One will be running our mysql database and the other will be our nginx web server.
- The image keyword is used to specify the image from dockerhub for our mysql and nginx containers
- For the database, we are using the ports keyword to mention the ports that need to be exposed for mysql.
- And then, we also specify the environment variables for mysql which are required to run mysql.
Now let’s run our Docker Compose file using the following command:
sudo ./docker-compose up
This command will take the docker-compose.yml file in your local directory and start building the containers.
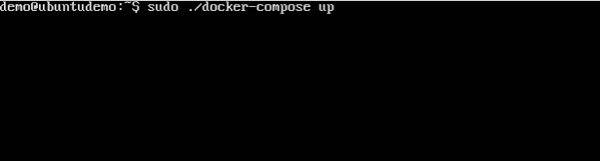
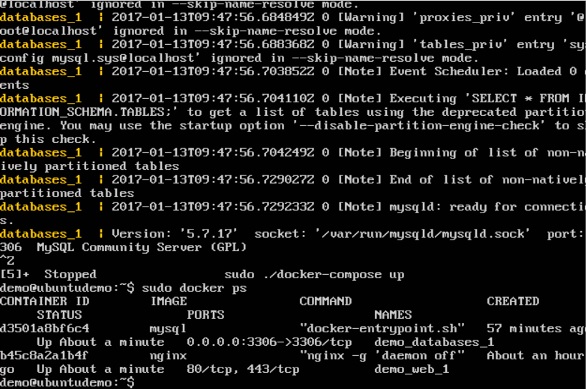
Once executed, all the images will start downloading and the containers will start automatically.
And when you do a docker ps, you can see that the containers are indeed up and running.
Continuous Integration with Docker
Docker has integrations with many Continuous Integrations tools, which also includes the popular CI tool known as Jenkins. Within Jenkins, you have plugins available which can be used to work with containers. So let’s quickly look at a Docker plugin available for the Jenkins tool.
Let’s go step by step and see what’s available in Jenkins for Docker containers.
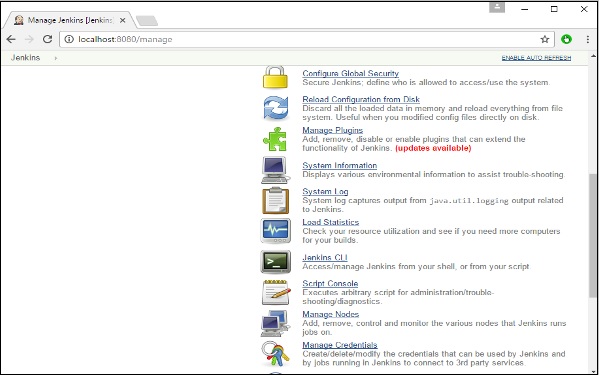
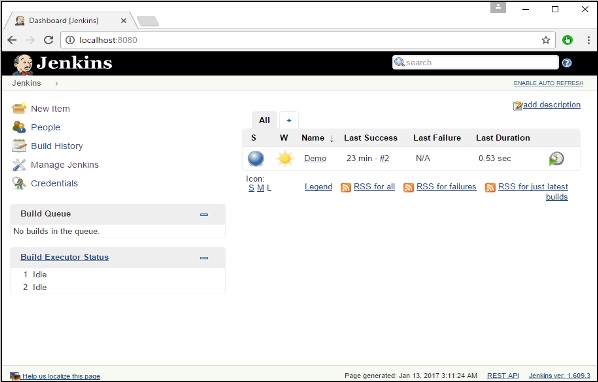
Go to your Jenkins dashboard and click Manage Jenkins.
Go to Manage Plugins.
Search for Docker plugins. Choose the Docker plugin and click the Install without restart button.

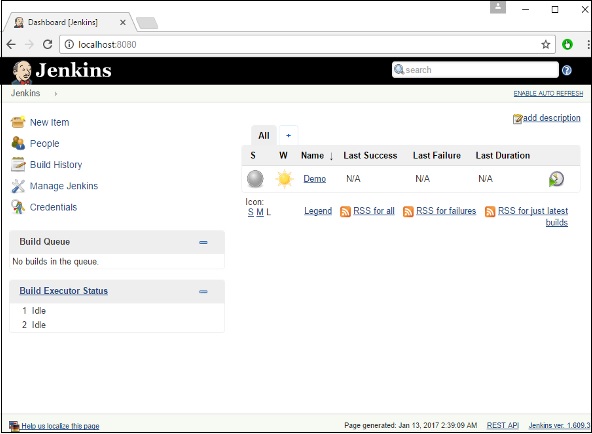
Once the installation is completed, go to your job in the Jenkins dashboard. In our example, we have a job called Demo.
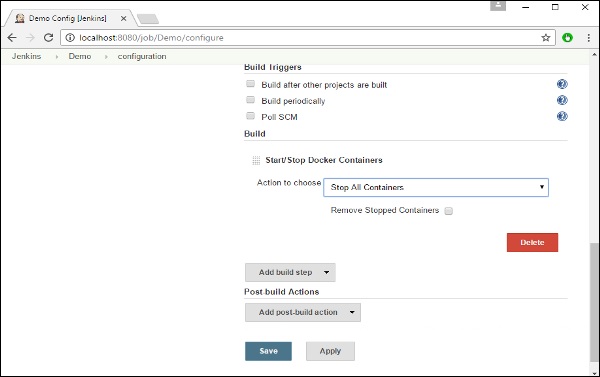
In the job, when you go to the Build step, you can now see the option to start and stop containers.

As a simple example, you can choose the further option to stop containers when the build is completed. Then, click the Save button.
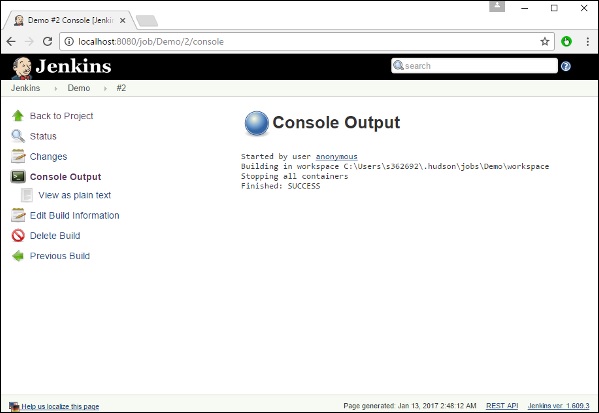
Now, just run your job in Jenkins. In the Console output, you will now be able to see that the command to Stop All containers has run.
Docker Storage
Storage Drivers
Docker has multiple storage drivers that allow one to work with the underlying storage devices. The following table shows the different storage drivers along with the technology used for the storage drivers.
| Technology | Storage Driver |
|---|---|
| OverlayFS | overlay or overlay2 |
| AUFS | aufs |
| Btrfs | brtfs |
| Device Manager | devicemanager |
| VFS | vfs |
| ZFS | zfs |
Let us now discuss some of the instances in which you would use the various storage drivers:
AUFS
- This is a stable driver; can be used for production-ready applications.
- It has good memory usage and is good for ensuring a smooth Docker experience for containers.
- There is a high-write activity associated with this driver which should be considered.
- It’s good for systems which are of Platform as a service type work.
Devicemapper
- This is a stable driver; ensures a smooth Docker experience.
- This driver is good for testing applications in the lab.
- This driver is in line with the main Linux kernel functionality.
Btrfs
- This driver is in line with the main Linux kernel functionality.
- There is a high-write activity associated with this driver which should be considered.
- This driver is good for instances where you maintain multiple build pools.
Ovelay
- This is a stable driver and it is in line with the main Linux kernel functionality.
- It has a good memory usage.
- This driver is good for testing applications in the lab.
ZFS
- This is a stable driver and it is good for testing applications in the lab.
- It’s good for systems which are of Platform-as-a-Service type work.
Storage Driver Info
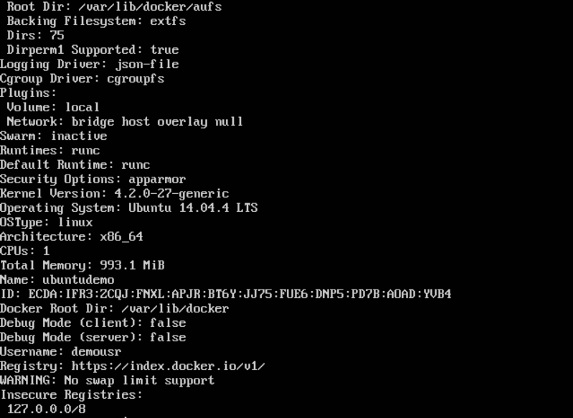
To see the storage driver being used, issue the docker info command.
sudo docker info
The command will provide all relative information on the Docker component installed on the Docker Host.
The following output shows that the main driver used is the aufs driver and that the root directory is stored in /var/lib/docker/aufs.
Data Volumes
In Docker, you have a separate volume that can be shared across containers. These are known as data volumes. Some of the features of data volume are:
- They are initialized when the container is created.
- They can be shared and also reused amongst many containers.
- Any changes to the volume itself can be made directly.
- They exist even after the container is deleted.
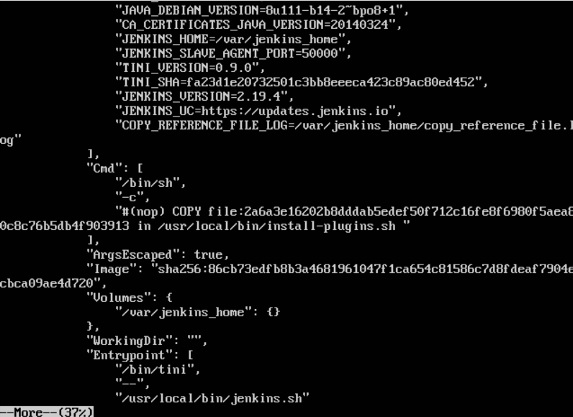
Let’s look at our Jenkins container. Let’s do a docker inspect to see the details of this image. We can issue the following command to write the output of the docker inspect command to a text file and then view the file accordingly.
sudo docker inspect Jenkins > tmp.txt
When you view the text file using the more command, you will see an entry as JENKINS_HOME=/var/Jenkins_home.
This is the mapping that is done within the container via the Jenkins image.
Now suppose you wanted to map the volume in the container to a local volume, then you need to specify the –v option when launching the container. An example is shown below:
sudo docker run –d –v /home/demo:/var/jenkins_home –p 8080:8080 –p 50000:50000 jenkins
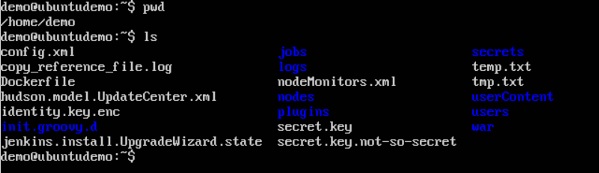
The –v option is used to map the volume in the container which is /var/jenkins_home to a location on our Docker Host which is /home/demo.

Now if you go to the /home/demo location on your Docker Host after launching your container, you will see all the container files present there.
Change Storage Driver
If you wanted to change to the storage driver used for a container, you can do so when launching the container. This can be done by using the –volume-driver parameter when using the docker run command. An example is given below:
sudo docker run –d –volume-driver=flocker –v /home/demo:/var/jenkins_home –p 8080:8080 –p 50000:50000 jenkins
The –volume-driver option is used to specify another storage driver for the container.

To confirm that the driver has been changed, first let’s use the docker ps command to see the running containers and get the container ID. So, issue the following command first:
sudo docker ps
Then issue a docker inspect against the container and put the output in a text file using the command.
sudo docker inspect 9bffb1bfebee > temp.txt
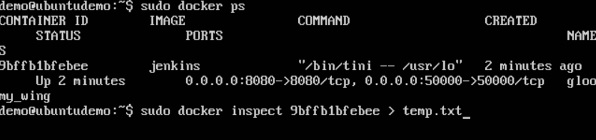
If you browse through the text file and go to the line which says VolumeDriver, you will see that the driver name has been changed.

Create a Volume
A volume can be created beforehand using the docker command. Let’s learn more about this command.
sudo docker volume create –-name = demo –opt o = size = 100m
In the above command, we are creating a volume of size 100MB and with a name of demo.
The output of the above command is shown below:

List all Volumes
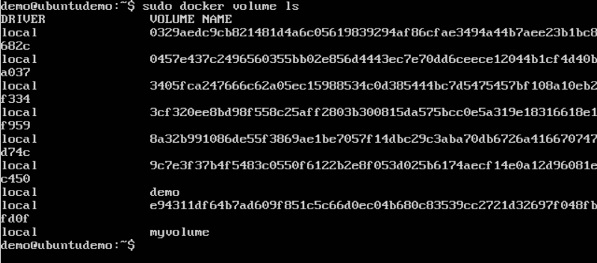
You can also list all the docker volumes on a docker host. More details on this command is given below:
sudo docker volume ls
The output of the above command is shown below:
Docker Swarm
Docker offers its own orchestration system called Docker Swarm.
UCP (Universal Control Plane)
DTR (Docker Trusted Registry)