
Overview
Kubernetes is an orchestration framework for Docker containers which helps expose containers as services to the outside world. For example, you can have two services − One service would contain nginx and mongoDB, and another service would contain nginx and redis. Each service can have an IP or service point which can be connected by other applications. Kubernetes is then used to manage these services.
Architecture
The following diagram shows in a simplistic format how Kubernetes works from an architecture point of view.
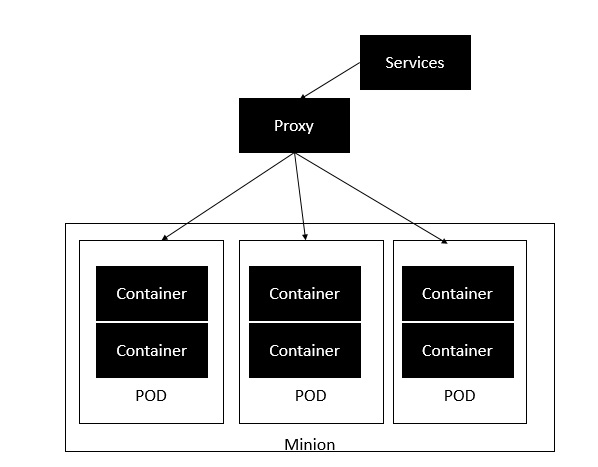
The minion is the node on which all the services run. You can have many minions running at one point in time. Each minion will host one or more POD. Each POD is like hosting a service. Each POD then contains the Docker containers. Each POD can host a different set of Docker containers. The proxy is then used to control the exposing of these services to the outside world.
Kubernetes has several components in its architecture. The role of each component is explained below:
etcd − This component is a highly available key-value store that is used for storing shared configuration and service discovery. Here the various applications will be able to connect to the services via the discovery service.
Flannel − This is a backend network which is required for the containers.
kube-apiserver − This is an API which can be used to orchestrate the Docker containers.
kube-controller-manager − This is used to control the Kubernetes services.
kube-scheduler − This is used to schedule the containers on hosts.
Kubelet − This is used to control the launching of containers via manifest files.
kube-proxy − This is used to provide network proxy services to the outside world.
Commands
PODS
List all Pods
- kubectl get pods
- kubectl get po
- kubectl get pods -o wide
Create/Run a Pod
- kubectl run nginx –image=nginx
Describe a Pod
- kubectl describe pod webapp
Delete a Pod
- kubectl delete pod webapp
- kubectl delete po webapp
Create/Run YAML File
- kubectl run redis –image=redis123 –dry-run=client -o yaml > redis-definition.yaml
This command along with Linux output redirection generates a resource definition file quickly, that you can then modify and create resources as required, instead of creating the files from scratch.
We use kubectl run command with –dry-run=client -o yaml option to create a manifest file.
If you simply want to test your command, use the –dry-run=client option. This will not create the resource. Instead, tell you whether the resource can be created and if your command is right.
-o yaml will output the resource definition in YAML format on the screen.
Generate POD Manifest YAML File
- kubectl run nginx –image=nginx –dry-run=client -o yaml
It generates POD Manifest YAML file (-o yaml), and does not create it (–dry-run).
kubectl run redis -l tier=db –image=redis:alpine
kubectl create -f redis-definition.yaml
- Use kubectl create -f command to create a resource from the manifest file.
kubectl edit pod redis
- Use the kubectl edit command to update the image of the pod.
kubectl apply -f redis-definition.yaml
- If you used a pod definition file then update the image in the definition file via Vi or Nano editor and then run kubectl apply command to update the image.
REPLICASET
kubectl get replicaset
kubectl get rs
kubectl api-resources | grep -i replicaset
- You can check for apiVersion of replicaset by the above command.
kubectl explain replicaset | grep VERSION
kubectl apply -f replicaset-definition.yaml
kubectl delete replicaset new-replica-set
kubectl delete -f replicaset-definition.yaml
kubectl edit replicaset new-replica-set
- Modify the attributes and then save the file.
kubectl scale rs new-replica-set –replicas=5
- Modify the replicas to scale up to 5 PODs.
DEPLOYMENT
kubectl get deployment
kubectl get deploy
- Count the number of Deployments.
kubectl get deployment -n dev-ns
kubectl describe deployment new-deploy
kubectl explain deployment
kubectl create deployment –image=nginx nginx
kubectl create deployment –image=nginx nginx –dry-run=client -o yaml
- It generates POD Manifest YAML file (-o yaml), and does not create it (–dry-run).
kubectl create deployment nginx –image=nginx –replicas=4
- It generates Deployment with 4 Replicas.
kubectl scale deployment nginx –replicas=4
- You can scale deployment using the above command.
kubectl create deployment nginx –image=nginx –dry-run=client -o yaml > nginx-deployment.yaml
- It creates POD Manifest YAML file.
NAMESPACE
kubectl get namespace
kubectl get ns –no-headers | wc -l
- Get the exact number of namespaces.
kubectl get pods –namespace=research
kubectl -n research get pods –no-headers | wc -l
kubectl run redis –image=redis -n finance
kubectl get pods –all-namespaces
kubectl create namespace dev-ns
kubectl create ns dev-ns
kubectl create deployment redis-deploy –image=redis –replicas=2 -n dev-ns
SERVICE
kubectl get svc -n=marketing
kubectl get svc redis
kubectl get svc
kubectl describe svc redis-service
kubectl expose pod redis –port=6379 –name=redis-service –dry-run=client -o yaml
- Create a Service named redis-service of type ClusterIP to expose pod redis on port 6379.
- This will automatically use the pod’s labels as selectors.
kubectl create service clusterip redis –tcp=6379:6379 –dry-run=client -o yaml
- This will not use the pods’ labels as selectors; instead it will assume selectors as app=redis. You cannot pass in selectors as an option. So it does not work well if your pod has a different label set. So generate the file and modify the selectors before creating the service.
kubectl expose pod nginx –port=80 –name nginx-service –type=NodePort –dry-run=client -o yaml
- Create a Service named nginx of type NodePort to expose pod nginx’s port 80.
- This will automatically use the pod’s labels as selectors, but you cannot specify the node port. You have to generate a definition file and then add the node port in manually before creating the service with the pod.
kubectl create service nodeport nginx –tcp=80:80 –node-port=30080 –dry-run=client -o yaml
- This will not use the pods’ labels as selectors.
kubectl run httpd –image:httpd:alpine –port=80 –expose
Docker Images
Practice Test
How many images are available on this host?
- docker images

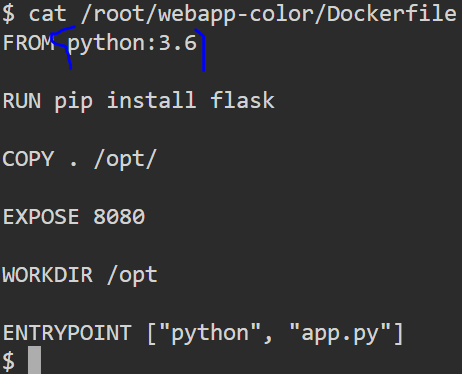
We just downloaded the code of an application. What is the base image used in the Dockerfile?
- cat /root/webapp-color/Dockerfile
Build a docker image using the Dockerfile and name it webapp-color. No tag to be specified.
- cd /root/webapp-color
- docker build -t webapp-color .
At the end of the command, we used the “.” (dot) symbol which indicates for the current directory, so you need to run this command from within the directory that has the Dockerfile.
Run an instance of the image webapp-color and publish port 8080 on the container to 8282 on the host.
- docker run -p 8282:8080 webapp-color
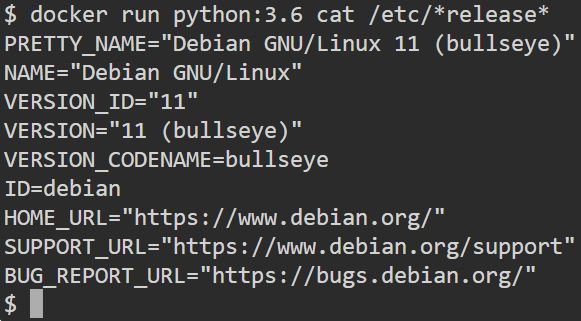
What is the base Operating System used by the python:3.6 image?
- docker run python:3.6 cat /etc/*release*
Build a new smaller docker image by modifying the same Dockerfile and name it webapp-color and tag it lite.
- docker build -t webapp-color:lite .
Install Kubenetes
In this section, we will see how to install Kubenetes via kubeadm. This is a tool which helps in the installation of Kubernetes. Let’s go step by step and learn how to install Kubernetes.
Step 1 − Ensure that the Ubuntu server version you are working on is 16.04.
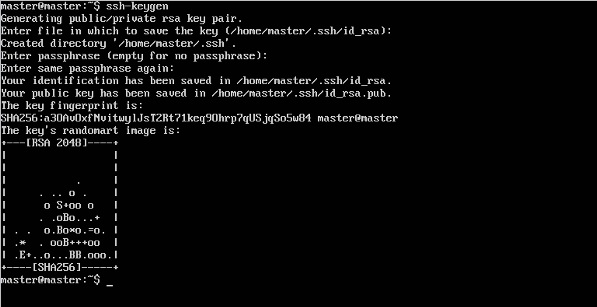
Step 2 − Ensure that you generate a ssh key which can be used for ssh login. You can do this using the following command.
ssh-keygen
This will generate a key in your home folder as shown below.
Step 3 − Next, depending on the version of Ubuntu you have, you will need to add the relevant site to the docker.list for the apt package manager, so that it will be able to detect the Kubernetes packages from the kubernetes site and download them accordingly.
We can do it using the following commands.
curl -s https://packages.cloud.google.com/apt/doc/apt-key.gpg | apt-key add – echo “deb http://apt.kubernetes.io/ kubernetes-xenial main” | sudo tee /etc/apt/sources.list.d/docker.list
Step 4 − We then issue an apt-get update to ensure all packages are downloaded on the Ubuntu server.
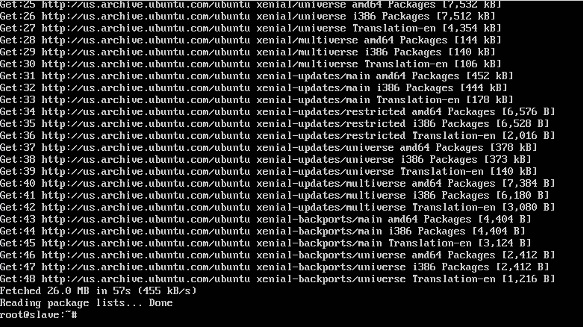
Step 5 − Install the Docker package as detailed in the earlier sections.
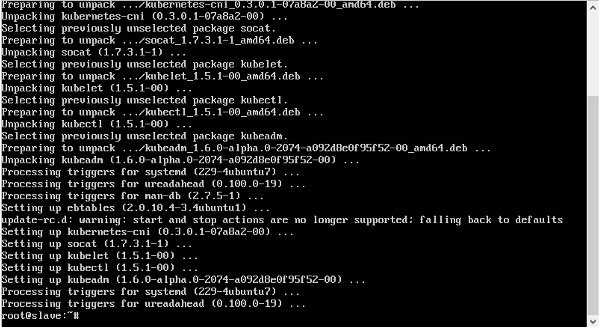
Step 6 − Now it’s time to install kubernetes by installing the following packages:
apt-get install –y kubelet kubeadm kubectl kubernetes-cni

Step 7 − Once all kubernetes packages are downloaded, it’s time to start the kubernetes controller using the following command:
kubeadm init
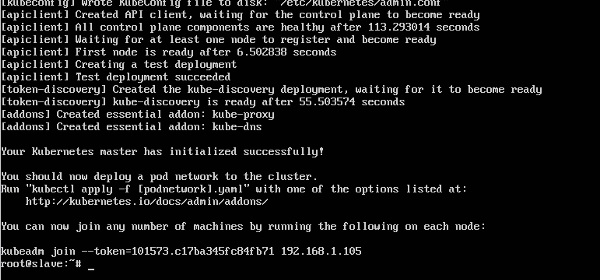
Once done, you will get a successful message that the master is up and running and nodes can now join the cluster.